

Key Takeaways
Why Caulk Failure Is More Than a Cosmetic Problem
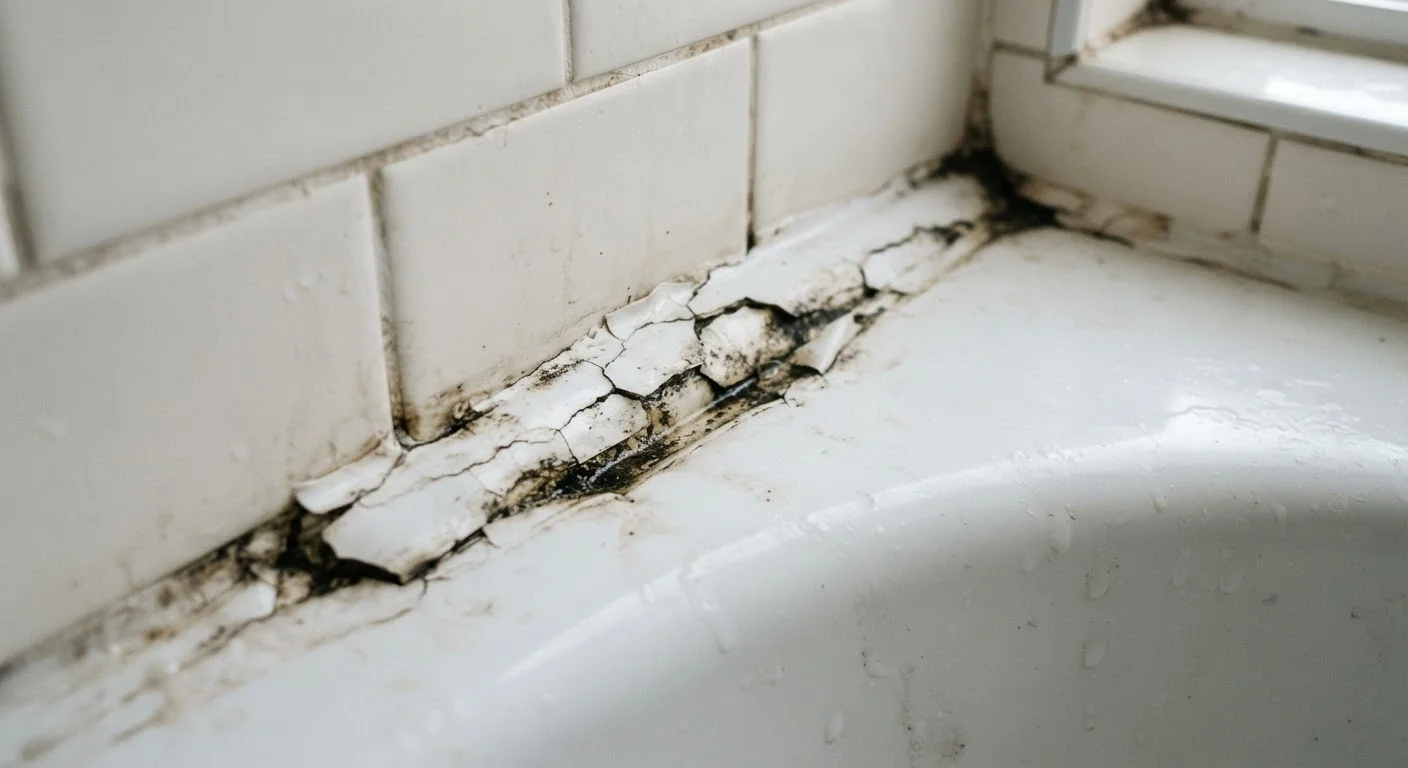
A cracked or peeling caulk line might look like a minor eyesore, but it often signals a more serious problem: water is finding its way into places it shouldn't. Around bathtubs, showers, sinks, windows, and exterior trim, caulk serves as a critical moisture barrier. When it breaks down, water can infiltrate wall cavities, subfloors, and framing — damage that's expensive and sometimes invisible until it's extensive.
Understanding why caulk fails puts you in a much better position to fix it properly and make the repair last. This article walks through the most common mistakes homeowners make when caulking — and what to do instead. For a broader view of how small maintenance gaps compound over time, see our guide to overlooked home maintenance tasks.
Applying new caulk directly over old, failing caulk without removing it first.
Why it happens: It seems faster, and the fresh layer looks fine initially — so homeowners skip the time-consuming removal step.
Caulking over a surface that isn't fully dry.
Why it happens: Homeowners often re-caulk right after cleaning, or before a recently wet tub surround has had time to dry out completely.
Using the wrong type of caulk for the location or substrate.
Why it happens: Caulk products look similar on store shelves, and many buyers default to whatever is cheapest or most familiar regardless of the application.
Skipping surface cleaning before application, leaving grease, soap film, or mildew on the joint.
Why it happens: The surface may look clean to the eye even when contaminated with soap residue or body oils that will prevent adhesion.
Applying too thick a bead, or leaving gaps and voids in the caulk line.
Why it happens: Thick beads feel more substantial, but excess caulk is harder to tool smoothly and creates surface stress points. Gaps happen when pace and pressure are inconsistent.
How to Re-Caulk the Right Way
Once you understand what causes caulk to fail, the repair process becomes much more straightforward. Follow these steps to give your fresh application the best chance of lasting.
Step 1: Full Removal
Use a plastic or metal caulk removal tool — or a utility knife used carefully — to cut away all existing caulk. Don't leave any residue. Even small remnants will undermine adhesion of the new material. A caulk softener product can help loosen stubborn silicone beads.
Step 2: Clean and Dry Thoroughly
Wipe the joint with isopropyl alcohol to remove soap scum, oils, and mildew. Then wait. In a bathroom, this can mean leaving the area dry for 24 hours or more before applying new caulk. Patience here pays off.
Don't Caulk Over Active Mold
If you see black or pink mold growth in or around the joint, sealing over it will trap moisture and allow mold to continue spreading behind the caulk. Address the source of moisture first, treat affected surfaces according to safe mold remediation practices, and ensure the area is fully dry before re-caulking. Extensive mold growth — especially on drywall — may require professional assessment.
Step 3: Choose the Right Caulk
For wet areas like tubs and showers, 100% silicone or siliconized latex caulk with mildewcide is appropriate. For painted interior trim and baseboards, paintable acrylic latex caulk is easier to work with. For exterior gaps around windows and siding, look for a flexible, UV-resistant formulation rated for outdoor use.
Step 4: Apply and Smooth
Cut the tube nozzle at a 45-degree angle to match your joint width. Apply steady, even pressure and move at a consistent pace. Smooth the bead immediately with a wet finger or a caulk finishing tool. Wipe away excess before it skins over. Allow full cure time — often 24–48 hours for silicone — before exposing to moisture.
If your walls show signs of soft drywall or water staining behind a failed caulk line, address those before re-caulking. Our drywall repair guide covers patching techniques at various scales.
When Re-Caulking Isn't Enough
If caulk fails repeatedly in the same location — especially within a year of a fresh application — it may indicate structural movement, a chronic moisture problem, or inadequate waterproofing behind the tile. In these cases, re-caulking is a temporary patch, not a fix. A licensed contractor or tile professional should evaluate whether the underlying installation needs to be addressed.